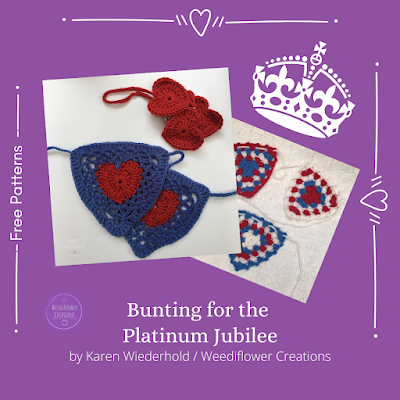
With preparations for the Queen's Platinum Jubilee in full swing here in the UK, I have the perfect free crochet patterns for your decorating needs.
These patterns have been available on my blog and website for some time and have proven themselves to be versatile for many occasions over the years. So with this versatility in mind, I offer them to you once again for this sparkling occasion.
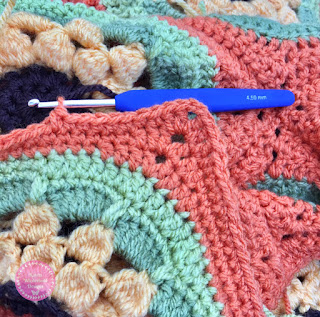
Here is the promised update of my popular crochet pattern for the Mitred Granny Square (or Optical Illusion Square as some of my subscribers have described it). It's the latest of my older patterns to make it's move from my blog over to my new website — which leaves just three of my older patterns to make the move and then the pattern transission is complete.
I first published this pattern here on my blog in February 2013 after coming up with the design while planning a blanket for my teenage son. I wanted the blanket to have the feel of a granny square blanket but the look needed to have a more modern take on the traditional look to suit him. The square pattern I envisaged using also needed to be easy for crocheting while watching television. With a bit of fiddling about and some experimenting my Mitred Granny Square evolved. I'm really pleased with the shading or optical illusion this square gives to the completed blanket. So if you have an empty hook and some yarn looking for a project, then this could be the one for you.
Searching for the perfect flower arrangement to send to my in-laws in South Africa for Christmas, which preferably contained a Gerbera or two because they are my mother-in-law’s favourite, was the inspiration for this creation. ‘Gerbera’ for Ineke.
Click the image to be taken to the FREE pattern over on my website.
I had such fun working on this Snowflake pattern this week and I hope you have lots of fun making them too. I'm looking forward to making a whole blizzard of them each night while I watch television to decorate the house and tree with this winter - which might also help me to stop nibbling on mince pies quite so much.
I would really appreciate it and love it if you would help me to keep making and offering these free patterns by making a small donation on my Ko-fi account if you have used any of my patterns or just like my blog or Instagram. I don't receive yarn or supplies from sponsors so this would enable me to purchase yarn for new projects.
I'm so happy to be able to share my latest blanket pattern with you. I've been working on the blanket and pattern off and on since late last year. This blanket is perfect for beginners because the only stitches used are chains and trebles.
The colour palette here was inspired by seaside colours, however the design lends itself well to a whole host of colour combinations.
Wishing you loads of fun working on this design, and if you do change the colours i'd love to see a photo of your completed blanket.
Another oldie but a goodie. I first created this design eight years ago but was never entirely pleased with it, namely because of the yarn used at the time.
I really wanted to update the pattern and change the yarn, so I did and here it is as a surprise freebie in the middle of May 2020. I've renamed it 'Romantic Hearts' because it's perfect for anytime of year and any occassion, not just for Valentine's Day.
I had a few requests for a crochet pattern to make a rainbow, so I thought i'd make one up this afternoon for those who asked. I hope you like it.
K x
You will need some oddments of yarn in DK and a 4mm hook. The pattern will work just as well with Aran or Chunky yarn but remember you'll need to use the recommended size of hook for the yarn you use. Row1: Purple - Ch15. Turn.
Row 2: Tr1 into third chain from hook, Tr1 into each of next four chains, Tr2 into next chain, Tr1 into next chain, Tr2 into next chain, Tr1 into each of next four chains, Tr2 into last chain. Turn.
Row 3: Join Dark blue - Ch2 (this counts as the first Tr), Tr2 into first stitch, Tr1 into each of next five stitches, Tr2 into the next stitch (this is at the V created in Row 2), Tr1 into next two stitches, Tr2 into the next stitch (this is at the V created in Row 2), Tr1 into next five stitches, Tr3 into last stitch. Turn.
Row 4: Join Light Blue - Ch2 (this counts as the first Tr), Tr2 into first stitch, Tr1 into each of next three stitches, Tr2 into next stitch, Tr1 into next three stitches, Tr2 into the next stitch (this is at the V created in Row 3), Tr1 into next three stitches, Tr2 into the next stitch (this is at the V created in Row 3), Tr1 into next three stitches, Tr2 into next stitch, Tr1 into next three stitches, Tr3 into last stitch. Turn.
Row 5: Join Green - Ch2 (this counts as the first Tr), Tr2 into first stitch, Tr1 into each of next five stitches, Tr2 into next stitch (this is at the V created in Row 4), Tr1 into next four stitches, Tr2 into the next stitch (this is at the V created in Row 4), Tr1 into next four stitches, Tr2 into the next stitch (this is at the V created in Row 4), Tr1 into next four stitches, Tr2 into next stitch (this is at the V created in Row 4), Tr1 into next five stitches, Tr3 into last stitch. Turn.
Row 6: Join Yellow - Ch2 (this counts as the first Tr), Tr2 into first stitch, Tr1 into each of next seven stitches, Tr2 into next stitch (this is at the V created in Row 5), Tr1 into next five stitches, Tr2 into the next stitch (this is at the V created in Row 5), Tr1 into next five stitches, Tr2 into the next stitch (this is at the V created in Row 5), Tr1 into next five stitches, Tr2 into next stitch (this is at the V created in Row 5), Tr1 into next seven stitches, Tr3 into last stitch. Turn.
Row 7: Join Orange - Ch2 (this counts as the first Tr), Tr2 into first stitch, Tr1 into each of next nine stitches, Tr2 into next stitch (this is at the V created in Row 6), Tr1 into next six stitches, Tr2 into the next stitch (this is at the V created in Row 6), Tr1 into next six stitches, Tr2 into the next stitch (this is at the V created in Row 6), Tr1 into next six stitches, Tr2 into next stitch (this is at the V created in Row 6), Tr1 into next nine stitches, Tr3 into last stitch. Turn.
Row 8: Join Red - Ch2 (this counts as the first Tr), Tr2 into first stitch, Tr1 into each of next eleven stitches, Tr2 into next stitch (this is at the V created in Row 7), Tr1 into next seven stitches, Tr2 into the next stitch (this is at the V created in Row 7), Tr1 into next seven stitches, Tr2 into the next stitch (this is at the V created in Row 7), Tr1 into next seven stitches, Tr2 into next stitch (this is at the V created in Row 7), Tr1 into next eleven stitches, Tr3 into last stitch. Tie off.
Personal use only. Please do not sell or reproduce this pattern or use it for a paid class you may be teaching. If you wish to use it as a group project, please contact me in advance.Please remember to credit me if you make this project by linking my Instagram, Facebook Page or Blog on your social media posts or Pinterest etc.
You will need:
Double Knit yarn in Cream,Camel, Pink and Black
3.5mm hook
Aran or chunky will work just as well for a larger Bunny head, but you will need to increase your hook size accordingly.
Head
Round 1: Ch5 and join into ring with a SS into the first Ch.
Round 2: Ch3 (this acts as first Tr), Tr11, SS into the top of the first Tr to join.
Round 3: Ch3 (this acts as first Tr) Tr 1 into same place, T2 into each of the next 11 stitches (24 Tr).
Round 4: Ch3 (this acts as first Tr) Tr1 into same place *T1 into each of the next 2 stitches, T2 into next stitch*, repeat *to* 6 times, Tr1 into each of next 2 stitches, SS into top of first Tr to join. (32Tr). Tie off.
Ear One
Row 1: Join brown yarn into space between first two Trs of Round 5 of the head section, Ch6.
Row 2: Skipping first Chain, Tr1 into next 5 Ch, SS into space where the yarn was joined at the beginning of the row. Tie off.
Row 3: Join cream yarn into space where the brown section is attached in Round 1. Ch2, Dc1 into next 5 Ch, DC1 Tr1 DC1 into the first space at the tip of the ear, DC1 into next 6 stitches, SS into space where the yarn was joined at the beginning of the row. Tie off.
Ear Two
Join yarn into second group of Tr2 of Round 5 of the head section. Repeat as for ear one.
Stitch on facial features using oddments of yarn to complete.
I hope you enjoyed this easy little project for your Spring, Ostara or Easter decorating.
Love, Karen x
Project ideas:
Brooch:Add a brooch pin to the back of the head and attach it to your jacket, jumper or bag.
Embellishment: Stitch it to a hat, beanie, scarf, blanket or cushion for a fun embellishment.
Garland:Make a whole family of Bunny heads and thread them through the tops of their ears onto a long ribbon/string for a seasonal garland.
Sweet treat gift idea: Make two heads, stitch them together from the outer edge of the left ear around to the outer edge of the right ear - this leaves the top ear section open. Hide a cream egg inside for a sweet gift idea.
Personal use only. Please do not sell or reproduce this pattern or use it for a paid class you may be teaching. If you wish to use it as a group project, please contact me in advance.Please remember to credit me if you make this project by linking my Instagram, Facebook Page or Blog on your social media posts or Pinterest etc.